.EML File Extension
EML, which stands for ‘E-mail’, is the file extension of the Outlook Express Saved Mail Messages files. It belongs to the Microsoft range of e-mail management programs and is used for saving e-mails for storage and forwarding purposes. EML is a file extension for an e-mail message saved to a file in the MIME RFC 822 standard format by Microsoft Outlook Express as well as some other email programs. Files that contain the .eml file extension are email files that have usually been sent or received by a POP3 email application.
.MSG File Extension
MSG files are emails that have been formatted by Microsoft Outlook. This format is proprietary to Outlook. A .msg file holds the email message, the internet header information, and meta-data describing the email message.
.CSV File Extension
CSV (“Comma Separated Value”) file format is often used to exchange data between disparate applications. The file format, as it is used in Microsoft Excel, has become a pseudo standard throughout the industry, even among non-Microsoft platforms. A CSV file consists of any number of records, separated by line breaks of some kind; each record consists of fields, separated by some other character or string, most commonly a literal comma or tab.
Why do you need to convert an EML file into CSV?
CSV is a common, relatively simple file format that is widely supported by consumer, business and scientific applications. One of its most common usage is moving tabular data between programs that natively operate on incompatible (often proprietary and/or undocumented) formats. This works because so many programs support some variation of CSV at least as an alternative import/export format. For example, a user may need to transfer information from a database program that stores data in a proprietary format, to a spreadsheet that uses a completely different format. The database program most likely can export its data as “CSV”; the exported CSV file can then be imported by the spreadsheet program.
Steps
1) To begin converting the EML file into CSV, start the program PST Viewer Pro. On the left extreme right below the status bar and tools, you will find an explorer tree where you choose the windows folder which contains the emails stored in .eml format (Not to mention that PST Viewer Pro can also open .pst, .ost, .pst, winmail.dat, and even .mht files as well and it’s a six viewer in one).
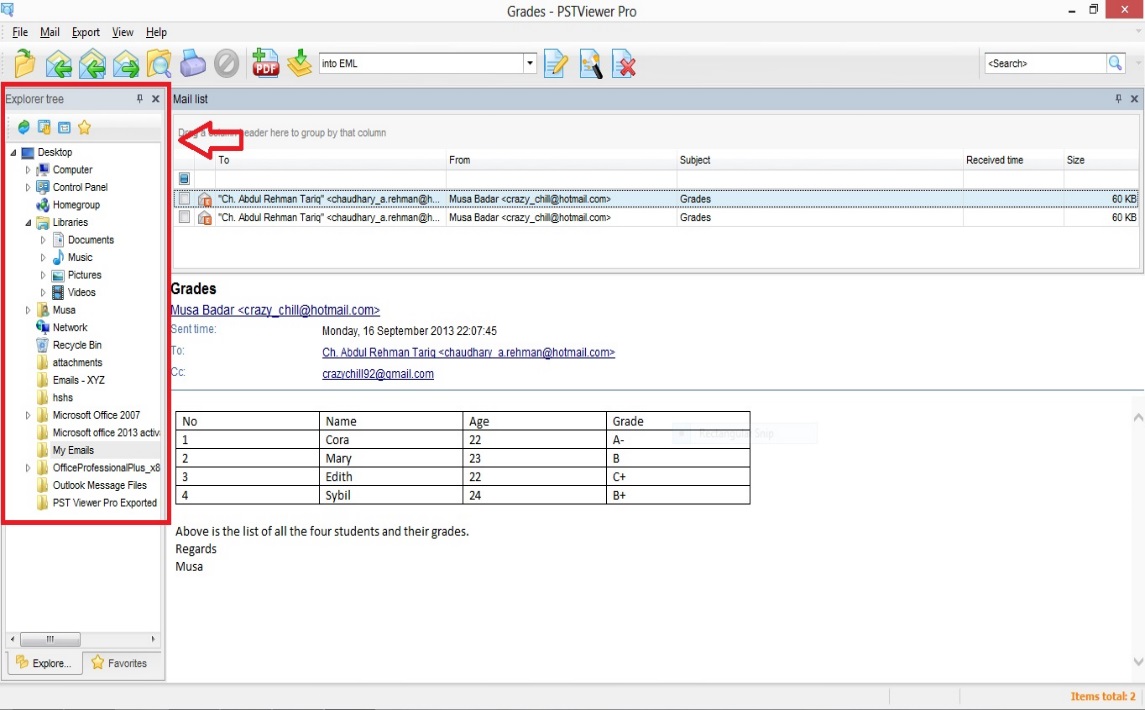
2) Now select the emails you want to convert, into the desired format. If you want to convert just one email, just simply select that email. If you want to select a range of emails in that folder, hold down windows shift key to select those range of emails. And above all, if you want to convert all the emails in that folder, press ctrol-A to select all of the emails. The selected emails will be highlighted. You can select random emails in a folder at one time too by pressing ctrol and clicking on the desired emails whose format is to be changed.
3) Now the selected emails are to be converted. Since the desired format is .csv format, we will need to give input to the PST Viewer Pro about the desired format of export file. To do so click on the “New Profile” icon given in the Tools below the Status bar. This same option of “New Profile” is also given in the “Export” heading in the Status bar. On clicking “New Profile” a new widow pops up named as “New Export Profile Setup”.
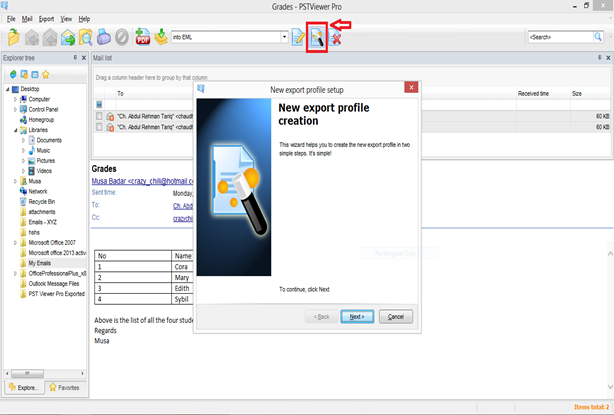
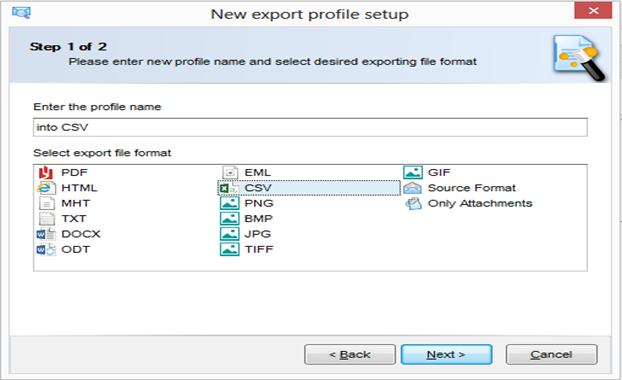
4) Once “New Export Profile Setup” window appears, click on Next. A new window will prompt on your screen asking two things; the new profile name and the export profile format. Give any desired profile name such as “into CSV” for my case and select the export profile format as desired which is CSV format currently. Once you have done this, click on Next.
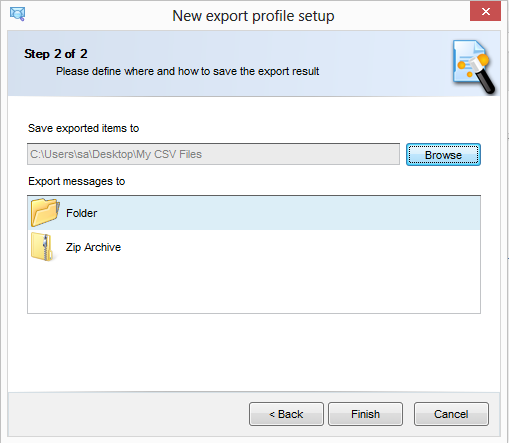
5) On clicking next, a window appears which demands you to select the folder in which exported items (converted items) are to be saved. There will be another option, if to save the exported file in a direct folder or in a zipped folder in compressed form. This is for you to decide. Once you do this, click on Finish.
6) Once the profile has been created, now all you have to do is to export the emails to the desired format using that profile. This is the easiest of the steps since all you have to do is to press ctrol-E or click on “Export” in the status bar or the “Export” icon in the tools. (Note: When clicking on Export icon in the tools, make sure that the selected profile is the one you created or the one that you have made for the desired format of converting).
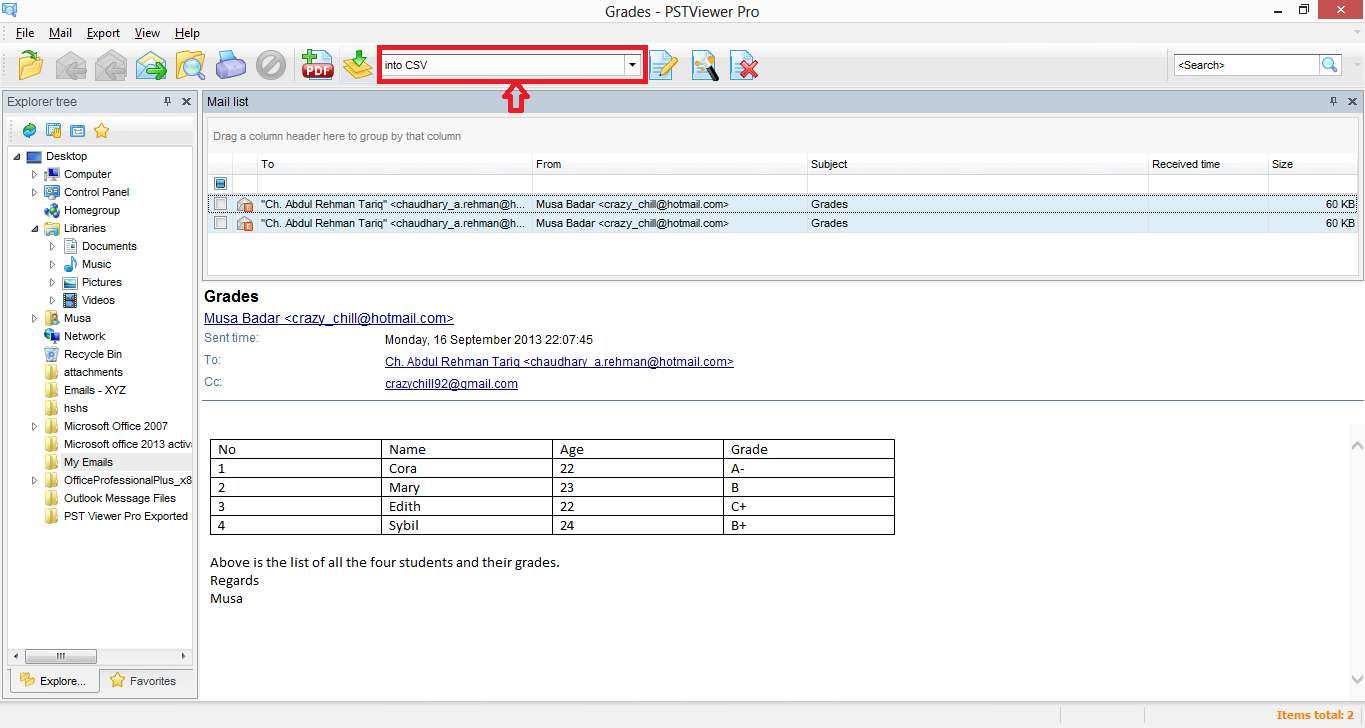
7) The task has of converting the file extension from .eml to .csv has been finished. The selected emails .eml format have been converted into .csv format. The export folder that you selected contains the converted items.
8) Now the next task is to import these csv files into Microsoft Excel. As it has already been mentioned that csv files generally contain tabular data that can be best manipulated and displayed via Microsoft Excel. Open the Microsoft Excel, any version would be equally compatible. You will need a blank workbook open.
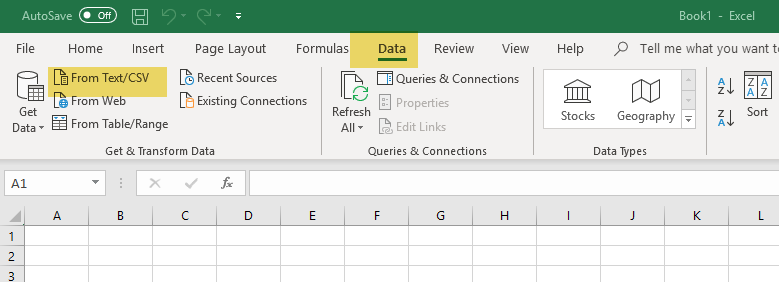
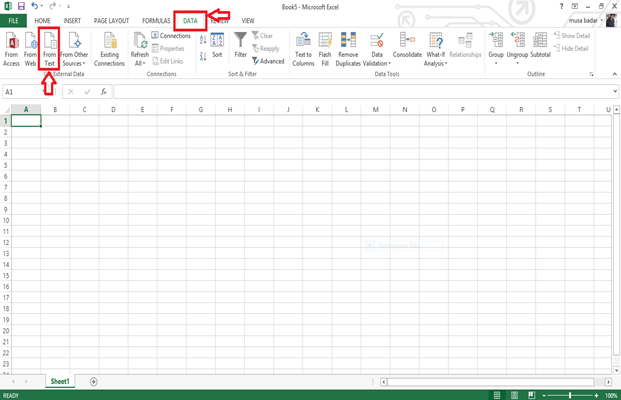
9) Go to menu >> Data >> Get External Data >> Import Text File. (If the menu options are greyed out this could be because you do not have a new workbook open). Now select the file you have just converted into csv from eml format. You may need to set ‘files of type’ drop-down box to ‘All Files ‘ to see your file. Having selected your file click ‘Import’.
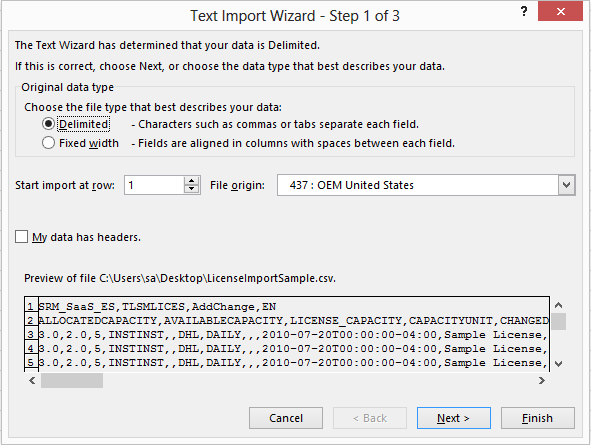
10) A new window of Text Import wizard at step 1 of 3 will appear on screen. Ensure that the ‘Delimited’ option is selected. The other option is Fixed Width which is rarely to be chosen. Click Next.
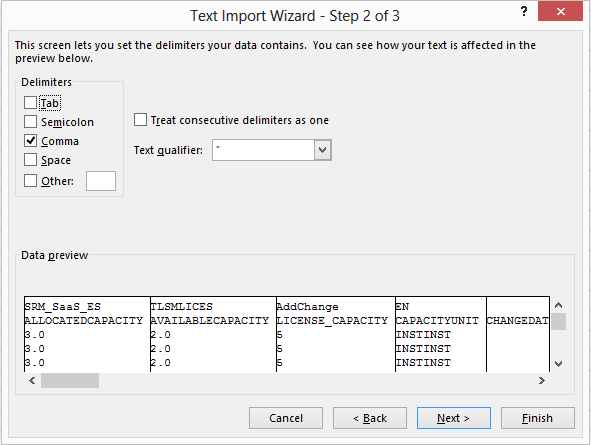
11) Step 2 of 3 in Text Import Wizard appears. In the delimiters section tick ‘Comma’ (Sometimes comma is not the separating variable, the separating variable can be judged easily from the csv file preview at the bottom of this Text Import Wizard). The text qualifier box should show the double-quote symbol. Click Next.
12) Step 3 of 3 in Text Import Wizard appears. You now need to set every column to be data format ‘Text’. The first column will initially be highlighted. Move the horizontal cursor as far as it will go to the right, and holding the shift key down, click the column heading on the very last column. You should now have every column highlighted together.
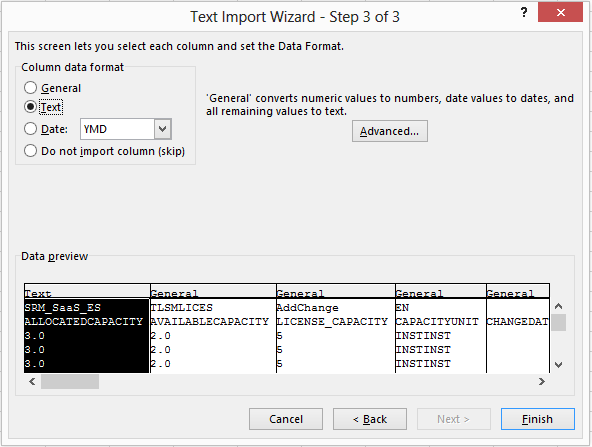
13) Click the ‘Text’ data format. It will now say ‘Text’ in the header of every column. Click Finish.
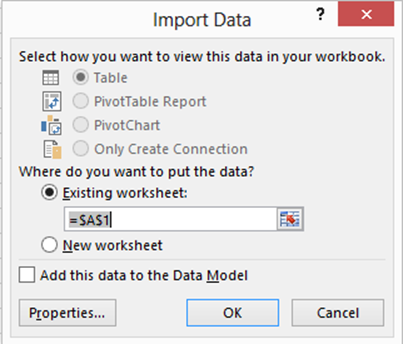
14) It may ask you ‘Where do you want to put the data?’. It will allow you to click into any cell on the blank worksheet to determine where the data should go. Click ‘OK’ to proceed.
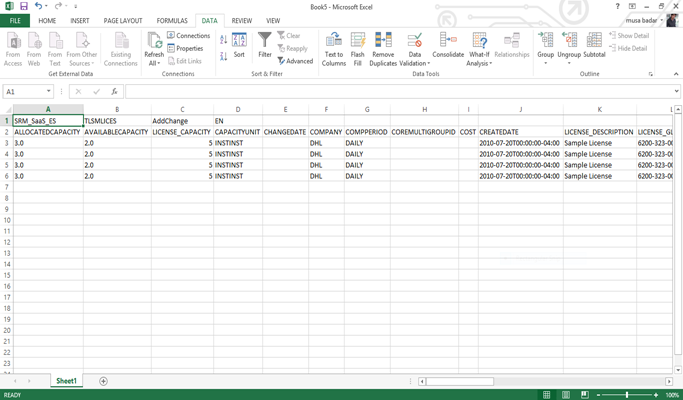
15) The data should now appear in the spreadsheet. Where column headings are included these will appear in the top row. Check that fields have not lost leading zeros where applicable.